Persistent in-memory variables

Openremote default configuration suffers the illness of cheap Chinese devices — it forgets almost everything after power on/off cycle. This article describes how to preserve in-memory variables. If you want to save your in memory variables with rules presented here, please follow these guidelines:

  • A name of in-memory variable, which should be preserved between restarts, must begin with capital string “GV”, for example “GVRememberThis”;
  • This in-memory variable should have command ‘status’;
  • Sensor associated with this command should have exactly the same name — in our example “GVRememberThis”;
  • The sensor should be of type ‘custom’.

When you follow these guidelines and add following rules in the designer then Openremote controller will miraculously remember all “GV” started in-memory variables. GV stays for Global Variable.

package org.openremote.controller.protocol.preserve;
import java.io.*;
import org.openremote.controller.protocol.Event;
global org.openremote.controller.statuscache.CommandFacade execute;

function void _WriteToFile(String fn, Object o){
  String vl = o.toString();
  PrintWriter writer = new PrintWriter(fn+".txt", "UTF-8");
  try{
    writer.println(vl);
  } finally {
    writer.close();
  }
}

function String _ReadFromFile(String fn, String dft){
  String result = dft;
  try{
    BufferedReader fr = new BufferedReader(new InputStreamReader(new FileInputStream(fn+".txt"), "UTF-8"));
    try{
      result = fr.readLine();
    } finally {
      fr.close();
    }
  } catch (IOException e) {
    e.printStackTrace();
  }
  return(result);
}

rule "Store values"
timer(int: 1s)                                                                                             
when
  Event($s:source matches "^GV.*", $v:value!="status")
then
  _WriteToFile($s, $v);
end

rule "Init values"
  salience 100
when
(OR
  Event($s:source matches "^GV.*", value=="")
  Event($s:source matches "^GV.*", value=="status")
)
then
  execute.command($s, _ReadFromFile($s, "-"));
end

You can either use these rules in designer or save it separately in your controller’s subdirectory [path to the controller]/webapps/controller/rules/. The second solution has an advantage that these rules will always be available — even if there are no rules in the designer or rules are with errors. It should be a part of the standard Openremote distribution if you ask me 😉
Switch wireless devices reliable through Drools in OpenRemote

This post summarises my experience with having a wireless appliance switched on and off at certain parts of a day. This is a nice example of using Drools timers and internal facts.

Wireless suffers the problem of unreliable communication in a noisy, long distance environment. Even in the same room sometimes the transmission fails, this is my experience with EnOcean, Z-wave and WeMo. Luckily, this problem can be solved in Openremote in a smart way by sensing back the switch state and deciding if retransmission is necessary. This is an unique characteristics of Openremote architecture not commonly found in other home automation controllers. The algorithm presented below addresses this problem and is in my humble opinion a must have for everyone who has a need of reliable wireless switching.

First I’ve declared a fact which will be used by the switching algorithm state machine.

declare SocketState
  @role(event)
  on : int
  // -1: idle
  //  0: switching off
  //  1: switching on 
end

rule "Init SocketState"
when
then
  insert(new SocketState(-1));
end

Next, the rule for initiating switching on the appliance every Friday at 6:10 AM:

rule "Lamp on"
  timer(cron: 0 10 6 ? * fri) 
when
  Event(source=="SocketSwitching1.STATE", value=="off")
  $s: SocketState(on!=1)
then
  $s.setOn(1);
  update($s);
end

Note that the rule is executed only when socket is not yet turned on and not in switching StcketState. All it does is setting the SocketState fact into switching on state and pass it to other rules with update() statement.

Now, we will be sending wireless telegrams to the switching socket every 5 seconds as long as its state is off. Usually the light go on immediately, however when it is noisy few retransmissions are necessary.

rule "Lamp on execute"
  timer(int: 0s 5s) // repeat every 5 seconds
when
  $s: SocketState(on==1)
  Event(source=="SocketSwitching1.STATE", value=="off")
then
  execute.command("SocketSwitching1.ON"); // Light ON
end

Finally when the socket state is changed to on it is marked by SocketState fact:

rule "Lamp on executed"
when
  $s: SocketState(on==1)
  Event(source=="SocketSwitching1.STATE", value=="on")
then
  $s.setOn(-1);
  update($s);
end

The same algorithm is used for switching the socket off on 6:25 AM.

rule "Lamp off"
  timer(cron: 0 25 6 ? * fri) 
when
  Event(source=="SocketSwitching1.STATE", value=="on")
  $s: SocketState(on!=0)
then
  $s.setOn(0);
  update($s);  
end

rule "Lamp off execute"
  timer(int: 0s 5s)
when
  $s: SocketState(on==0)
  Event(source=="SocketSwitching1.STATE", value=="on")
then
  execute.command("SocketSwitching1.OFF"); // Light OFF
end

rule "Lamp off executed"
when
  $s: SocketState(on==0)
  Event(source=="SocketSwitching1.STATE", value=="off")
then
  $s.setOn(-1);
  update($s);
end

Because ON and OFF states sent by socket can easily be missed in noisy environment an extra bit of robustness is achieved by declaring the ON state in case when non-zero power measurement message arrives:

rule "SocketSwitching1 state ON through power"
// Set state ON when power is not 0
when
  Event(source=="SocketSwitching1.POWER", value!="0")
  Event(source=="SocketSwitching1.STATE", value!="on")
then
  execute.command("SocketSwitching1.ON");
end

The last touch is to retract the last power measurement fact so the repeating same values are processed by the rules engine. Without this rule when power measurement value stays the same the “SocketSwitching1 state ON through power” rule will be triggered only once (this is due to implementation of Drools engine within Openremote).

rule "SocketSwitching1 retract last power measurement"
salience -100 // Because of retracting of the event
when
  $s : Event(source=="SocketSwitching1.POWER",$v:value)
then
  retract($s);
end

No more free DynDNS … time for ORDNS :-)

Last Wednesday on May 7th 2014 DynDNS stopped with their free services. For people who like me use VPN to connect their home LAN this is not a pleasant message. The cheapest paid service from DynDNS is priced at $25/year. Luckily we have OpenRemote and it is very easy to recreate the dynamic DNS service for free. Please follow the steps:

  • register a domain name if you don’t already have one which you will be using for your home LAN. Free domains can be registered here freenom.com.
  • apply for free DNS service here namecheap.com. Setup the dynamic DNS service there too. This step will generate a password which will be used in the OpenRemote setDDNS command later.
  • create command in OpenRemote designer to read your external IP address: name = externalIP, protocol = HTTP, URL = http://ipecho.net/plain, HTTP method = GET, polling interval = 30m.
  • create sensor: name externalIP, command: externalIP, type: custom.
  • create command for setting the address record: name = setDDNS, protocol = HTTP, URL = http://dynamicdns.park-your-domain.com/update?host=@&domain=openremote.pl&password=password_at_namecheap.com&ip=${param}, HTTP method = GET.
  • create rules to forward your external IP changes:
    declare ExternalIP
      @role(event)
      ip : String
    end
    
    rule "ExternalIP init"
    when
      Event(source=="externalIP", $v: value)
      not ExternalIP()
    then
      insert (new ExternalIP($v.toString()));
      String message = "External IP initialized: '"+$v.toString();
      My_NMA nma = new My_NMA(message, -2);
      insert(nma);
      execute.command("setDDNS" , $v.toString());
    end
    
    rule "ExternalIP change"
    when
      Event(source=="externalIP", $v: value, value != "")
      $e: ExternalIP($i: ip, ip != $v)
    then
      String message = "External IP changed: '"+$i+"' -> '"+$v.toString()+"'";
      My_NMA nma = new My_NMA(message, 1);
      insert(nma);
      $e.setIp($v.toString());
      update($e);
      execute.command("setDDNS" , $v.toString());
    end


    The code above also sends push message to my smartphone using the Notify My Android service. Of course you can also use the Pushover service or remove the notification code from the rules.

  • In case you don’t need push service notifying about IP change then the rule below is all you need:
    rule "ExternalIP DDNS"
    when
      Event(source=="externalIP", $v: value!="")
    then
      execute.command("setDDNS" , $v.toString());
    end
    

Bravo, your OpenRemote is now paying you back 25$ a year for a VIP DynDNS account 😉

Sending Pushover notifications from Openremote

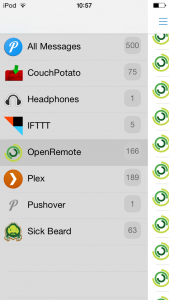
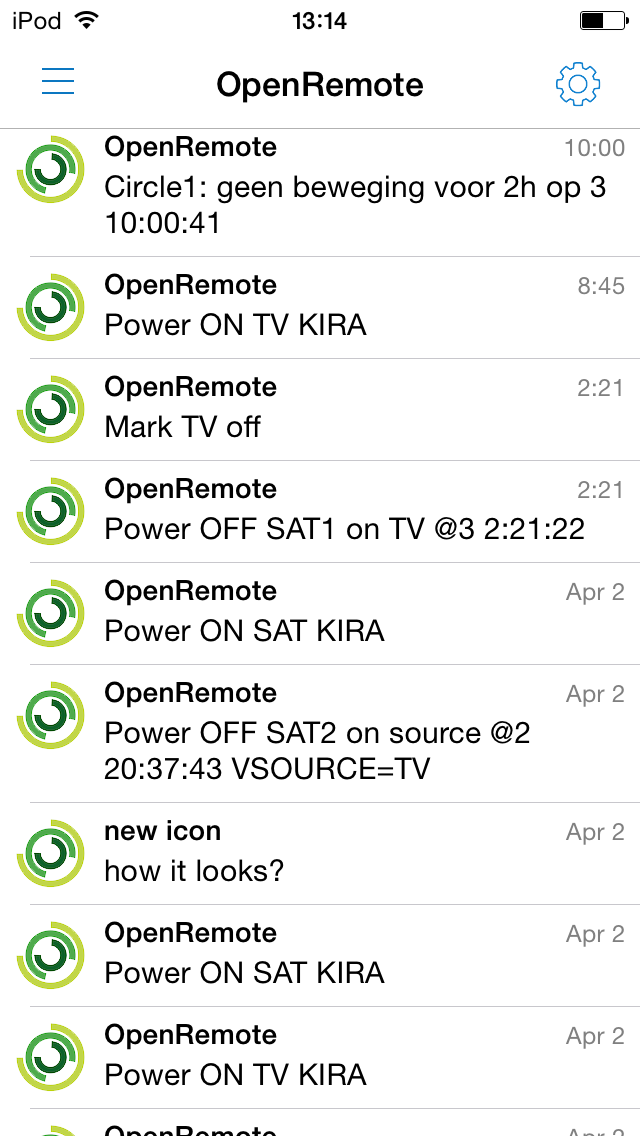
pushover summarypushover listPushover is a simple mobile notification system available for Android and iOS. It is similar to the Notify My Android however it is not free. Its API makes it possible to configure messages with custom icons (see images left) and notifications are easily send from within OpenRemote.

To send a message first you need to create a command:

  • name pushover.post
  • protocol HTTP
  • URL https://api.pushover.net/1/messages.json?token=aKfht4NDW5RimyYxXUhS6ADsURrqCH&user=yourUserKeyAfterRegistration&message=${param}
  • HTTP method POST

There are more parameters available and described in details on Pushover API’s page.
Note that the call uses ${param} to pass the message text from a rule:

rule "System start"
when eval(true)
then
  execute.command("pushover.post", "System start");
end

Notify My Android from OpenRemote

Openremote android app is not very useful for detecting alarm situations from OpenRemote. It lacks push notifications, however it is quite simple to use a 3rd party push solution like Notify My Android.

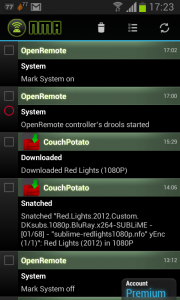
Here is example of NMA app screen on my smartphone with messages from OpenRemote:
NMA OpenRemote

The steps to do this are:

  • Create an account by Notify My Android and generate ApiKey which you will need for sending notifications. Put it in the following code in place of [your ApiKey from notifymyandroid.com].
  • Install NMA app on your Android device(s).
  • NMA offers many APIs but for OpenRemote the most obvious one is Java api. Download NMAClientLib.jar and place it in OpenRemote-Controller/webapps/controller/WEB-INF/lib/ directory.
  • Add the following rules:
// Notify my Android NMA
import com.usk.lib.NMAClientLib;

declare NMA_message
  apiKey : String
  appName : String
  priority : int
  event : String
  desc : String
  devKey : String
end

declare My_NMA
  message : String
  priority : int
end

rule "System start"
when eval(true)
then
  My_NMA nma = new My_NMA("OpenRemote controller's drools started", 1);
  insert(nma);
end

rule "System NMA"
when
  $vt : My_NMA()
then
  NMA_message n = new NMA_message();
  n.setApiKey("[your ApiKey from notifymyandroid.com]");
  n.setEvent("System");
  n.setDesc($vt.getMessage());
  n.setPriority($vt.getPriority());
  n.setDevKey(null);
  insert(n);
  retract($vt);
end

rule "Notify my Android"
when
  $n : NMA_message()
then
  try{
    if(NMAClientLib.notify("OpenRemote", $n.getEvent(), $n.getDesc(), $n.getPriority(),  $n.getApiKey(), $n.getDevKey())!=1)   
      throw new RuntimeException();
  }finally{
    retract($n);
  }
end
// NMA

This code will generate “OpenRemote controller’s drools started” notification with priority 1 each time the controller boots. Notifications are very handy for debugging rules file.

Simpleremote for home cinema demonstration

This demonstration shows integration of few home cinema components under the simpleremote concept. It shows how a cumbersome task of using a traditional remote control device in the modern home cinema setup can be simplified with the help of Openremote platform.

The test environment consists of:

  • Samsung TV UE46D7000 – LAN controlled;
  • Bose AV35 Home Theater – RS232 controlled;
  • Ferguson Ariva Satellite receive – LAN controlled;
  • Openremote eBox – controls everything;
  • EnOcean USB300 and PTM200 devices from EnOcean starter kit – energy harvesting devices (battery less).

During the demo you see how switching the source with Bose universal remote can be accelerated by the EnOcean 2 buttons switch. This is in fact not a demo but a real application which I’m using in my home everyday. Once I’ve made it I don’t want to switch sources traditional way anymore and I’m planning to buy more EnOcean switches and add them to my setup.

The integration of all components were possible thanks to the open source Openremote middleware. Although not visible on video, Openremote is the brain sitting behind all of this. I’m using a customized version of Openremote because not everything which I’m showing in this video is possible with the standard build. However, my changes are backward compatible, meaning that all Openremote legacy code would run on my version too. I’m planning to contribute my customization as soon as possible.

From the technical point of view the most interesting part is the usage of rules in Openremote to change buttons behavior based on a sensor value.
Here is code snippet a rule used for the ‘Switch TV’ button:

rule "Switch TV"
when
  ($evt : Event(source=="Button BI On", value=="ROCKER_BO_1")
       or Event(source=="V_TV STATUS", value=="ON"))
   $src : Event(source=="V1 STATUS")
then
  if($src.getValue().toString()=="TV")
  {
    execute.command("TV.PRECH");
  }else{
    System.out.println("Switch to TV");
    execute.command("BOSE.SELECT_TV");
    execute.command("TV.SOURCE_TV");
    TimeUnit.MILLISECONDS.sleep(500);
    execute.command("V1 ON","TV");
  }
end

As you see the button function depends on the “V1 STATUS” sensor value which keeps the current selected source.

If you want to know more about this example please leave a comment.

Temperature sensor’s calibration

Recently I’ve purchased EnOcean starting kit as I think that energy harvesting solutions have big potential. They are batteries free therefore maintenance free. This is a big advantage comparing to other technologies. Anyway, the set has a temperature sensor which I’ve added to my OpenRemote controller and after linking it to a label I’ve noticed that its value has 2.5 centigrade offset comparing to my thermostat. Although, EnOcean claims that the sensor is calibrated I trust more my thermostat, the offset is simply too much!

Luckily for OpenRemote this is not a big problem. The solution is as follows:

  1. have 2 sensors, the real that’s read from the device and a virtual linked to the user interface. Both should be custom sensors with the empty custom states list;
  2. for the virtual sensor, you would have “In-memory Virtual Command” VTEMP, command: STATUS and address: VTEMP;
  3. have a rule on the real value, do your computation, then call the write command.

The rule is (checked and tested to work correctly):

rule "Correct Temperature"
when
  CustomState(source=="Temperature", $v: value)
then
  double correctedValue = Double.parseDouble($v.toString()) - 2.5;
  double fahrenheit = (correctedValue*9) / 5 + 32;
  execute.command("VTEMP", String.format("%.1f \u2103 / %.1f \u2109", correctedValue, fahrenheit));
end

Note that the above code does more than only temperature correction. It also adds Fahrenheit so the final UI display is:
temperature_display